How to Mint Transfers
Mint from the Nintondo
Step 1: Go to the Inscriber Page.
Step 2: Connect your Nintondo Wallet.
Connect your wallet to the site. You can use the Web Wallet without downloading anything or use all the wallet management features with the Nintondo Wallet extension.

Step 3: Select the Tokens option on the left panel.
By default, Mint will be selected for you.
-
Select Transfer

Step 4: Selecting a token.
Find and select the token you need from the list.

Step 5: Enter a value.
Enter the desired number of tokens for minting in the input field next to it and click “Add Token“ button.


In the central file management panel, you can add (optional) or delete files. The maximum number of duplicates is 3000.
Step 6: Inscribe
Once you have selected the tokens you want to mint, simply click on the Inscribe button.
Please note that there is a Network Fee for completing the transaction.
The Network Fee is initially set to the default value, and we recommend using it, but if you want to set your own, simply click on the type to select yours.

Step 7: Sign transaction.
To complete the action, confirm the transaction in your wallet if you are using a browser extension. If you are using Web Wallet, this step will be skipped.

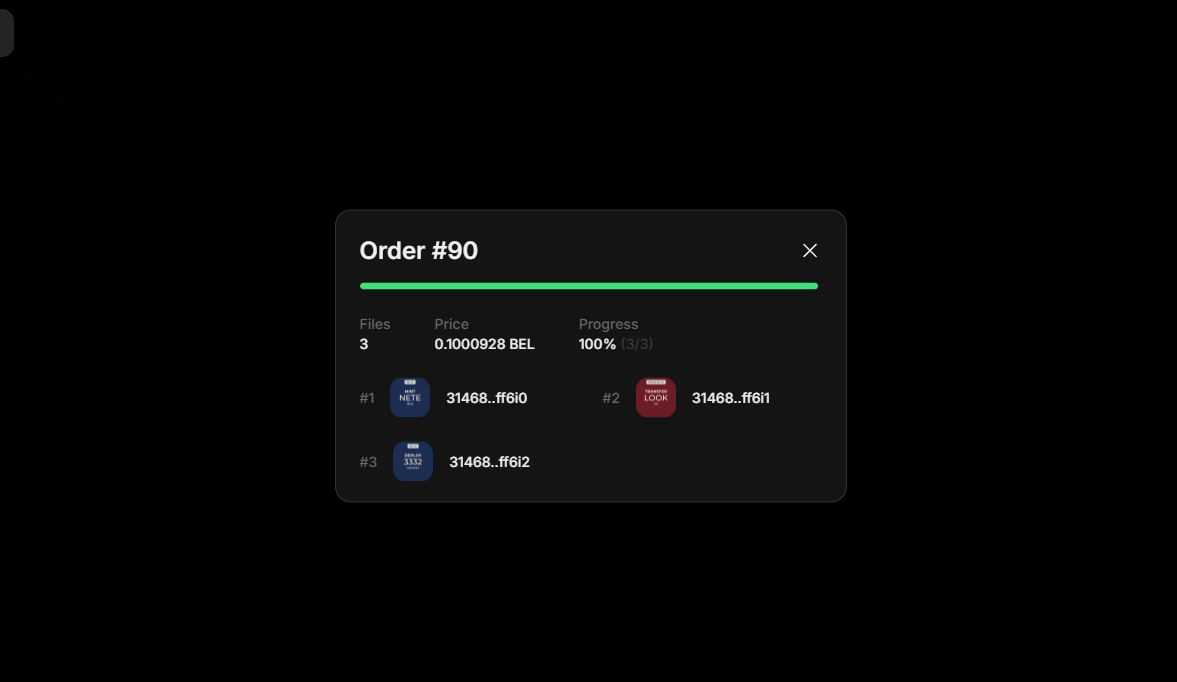
History.
After the process is complete, a list of files that you have inscribed will be available in the history list.
Mint from the Nintondo Wallet Extension.
Step 1: Go to My assets

Step 2: Open Tokens page

Step 3: Find and select the token you need.

Step 4: Click Mint.

Step 5: Enter amount
The Network Fee is initially set to the default value, and we recommend using it, but if you want to set your own, simply click on the type to select yours.

Step 6: Click Continue

History.
After the process is complete, a list of files that you have inscribed will be available in the history list.
